


Why do we need to upgrade Smart Contracts?
Normally, when we deploy smart contracts on the blockchain, it is impossible to edit the code deployed. And it should be totally fine that way. The fact that it could not be deployed to replace the existing codes means that that particular contract can not be modified afterward. (this increase safety of people who interact with that contract)
However, we might really want to edit the code on the contracts in some circumstances like spotting a severe bug on the smart contract that we just have to fix but we can not do so because of the mechanism. What we can do best is to deploy another smart contract that has the bug fixed, and all information migrated. Not only that, but we also need to fix the references that are tied to the old smart contracts, plus telling users to also migrate to use our services on the new contract.
Feel a bit overwhelmed with the process right? We also felt the same (been there, done that.) With our experiences, we found one use case that helps us with addressing the complex procedures. Let’s take a look at it!
Introducing “Upgradable Contract”
An Upgradable contract is a contract that can be (kind of) altered, after the deployment. At the time this article was written, to use an upgradeable smart contract, there is a tool, or plugin, to help us build. This plugin is introduced by OpenZeppelin.
How to use the plugin? Well, it is not that complicated. Just use this plugin to deploy contracts on hardhat or truffle. Whenever you want to edit the smart contracts, just use the same address to deploy the upgraded contracts via the plugin without worrying about transferring any state in the old implementation.

The method OpenZeppelin uses is the design pattern named “proxy pattern.” We will have two deployable contracts. The first one is the storage layer, which stores various states in smart contracts. The second is the logic layer where the contract runs its logic.
Whenever we interact with the contract, we interact through the proxy contract and then the proxy contract will pass on to the logic contract before sending the output back to us. That being said, imagine you want to change the logic of your smart contracts, you will just need to tell the proxy to refer to the new smart contracts and that is it! Users no longer need to switch the smart contract to interact, they can interact as usual (Super convenient, isn’t it?)
Should you wish to dig deeper, please refer to the official blog of OpenZeppelin.
How to do it?
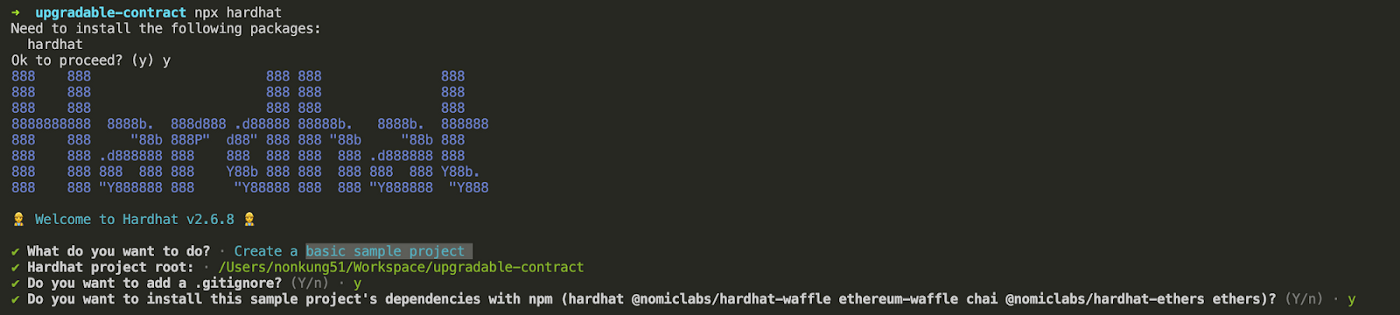
Let’s begin by building a new project, in this case, I will use hardhat to do so. To build a project just npx hardhat and choose the configuration as you wish. Here’s my config for illustration.
After we have set up the new project and added contract files, we then install the plugin to upgrade the contract mentioned earlier by using this command below.
After the installation, we have to add this config in the hardhat.config.js to let hardhat know that we are using the plugin.
That is done for the first step. Let’s try it out by clicking on Greeter.sol, the contract the hardhat generated for us.
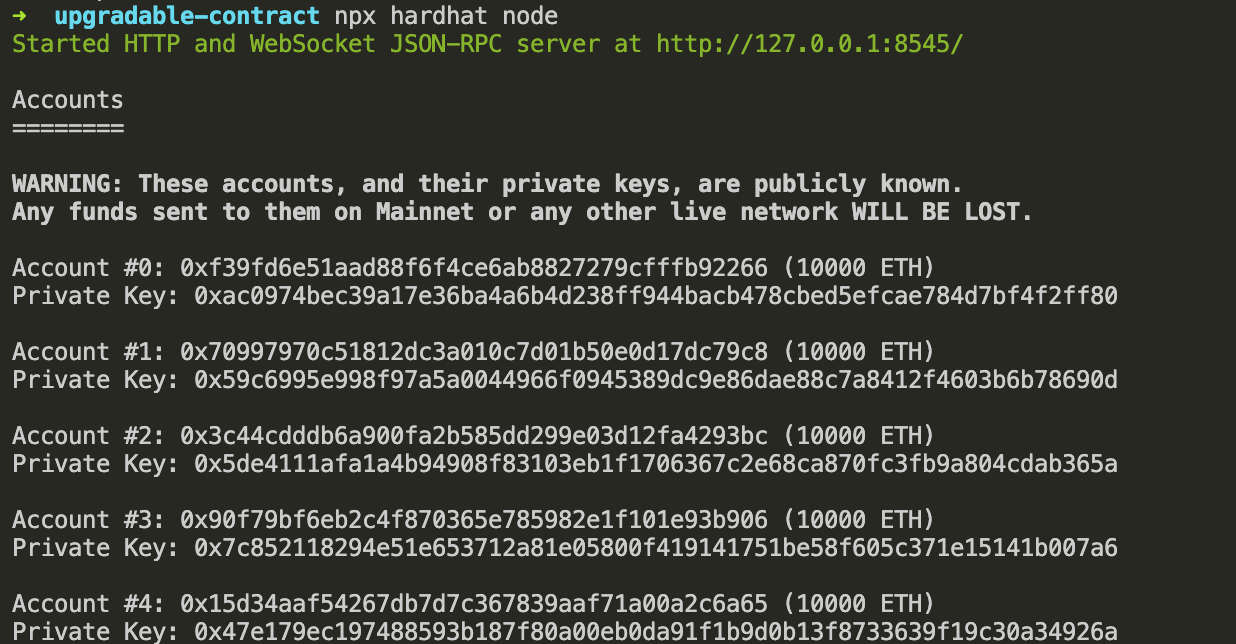
To glance at how it works, we run our local blockchain using npx hardhat node.
To interact with the chain we use
(Do not forget to choose localhost for the network)
Then try to deploy using the upgradable plugin.
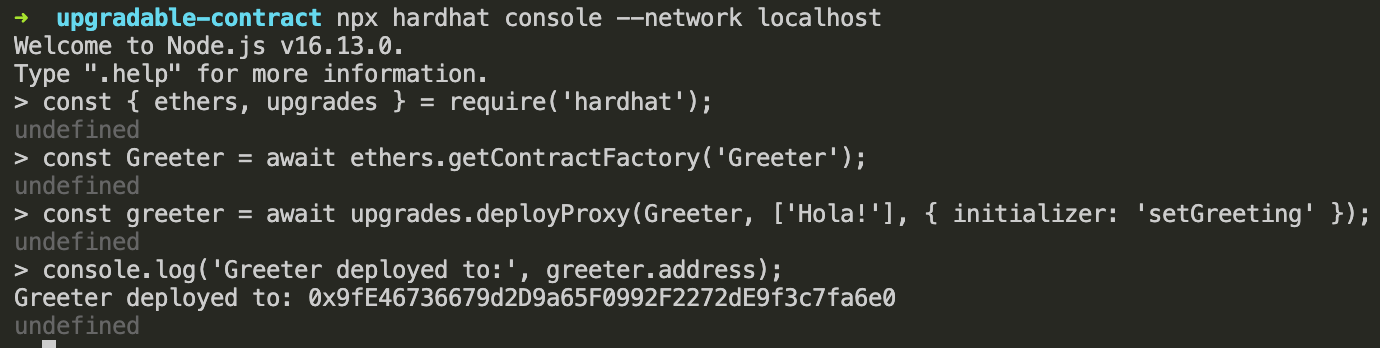
After the deployment, just copy the address to use to eye the results.
To view the contract that has been deployed, Laika Blockchain Lab is developing a tool called Laika that helps us make requests to interact with the smart contract without writing a single line of code. We are now under the incubation program of SCB10X, to learn more about us please visit this link
Laika can help us with this step. Wonder how? Let’s try it out. First, we visit the Laika application here https://web.getlaika.app and connect the wallet.
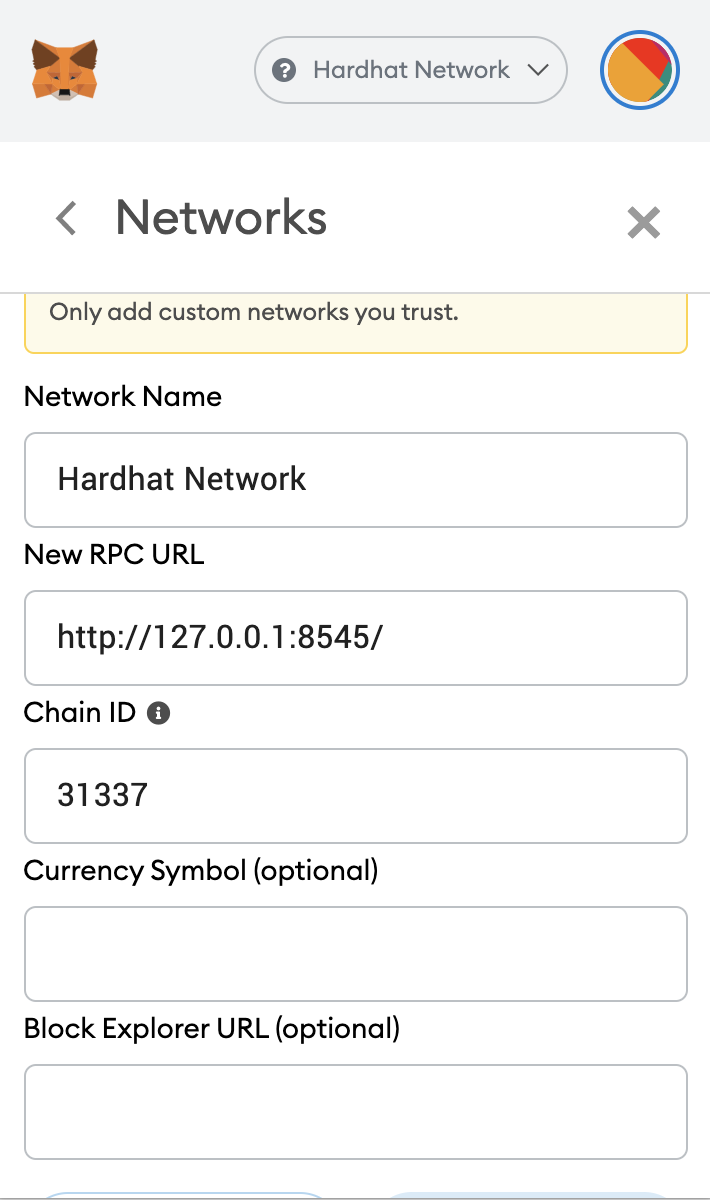
The goal, now, is we want to view the information on the localhost network. Please make sure that you have already had Hardhat set in place, if not, go here is how you can set it up.
In our Laika platform, to make a request, select the “New” button to create a new collection.
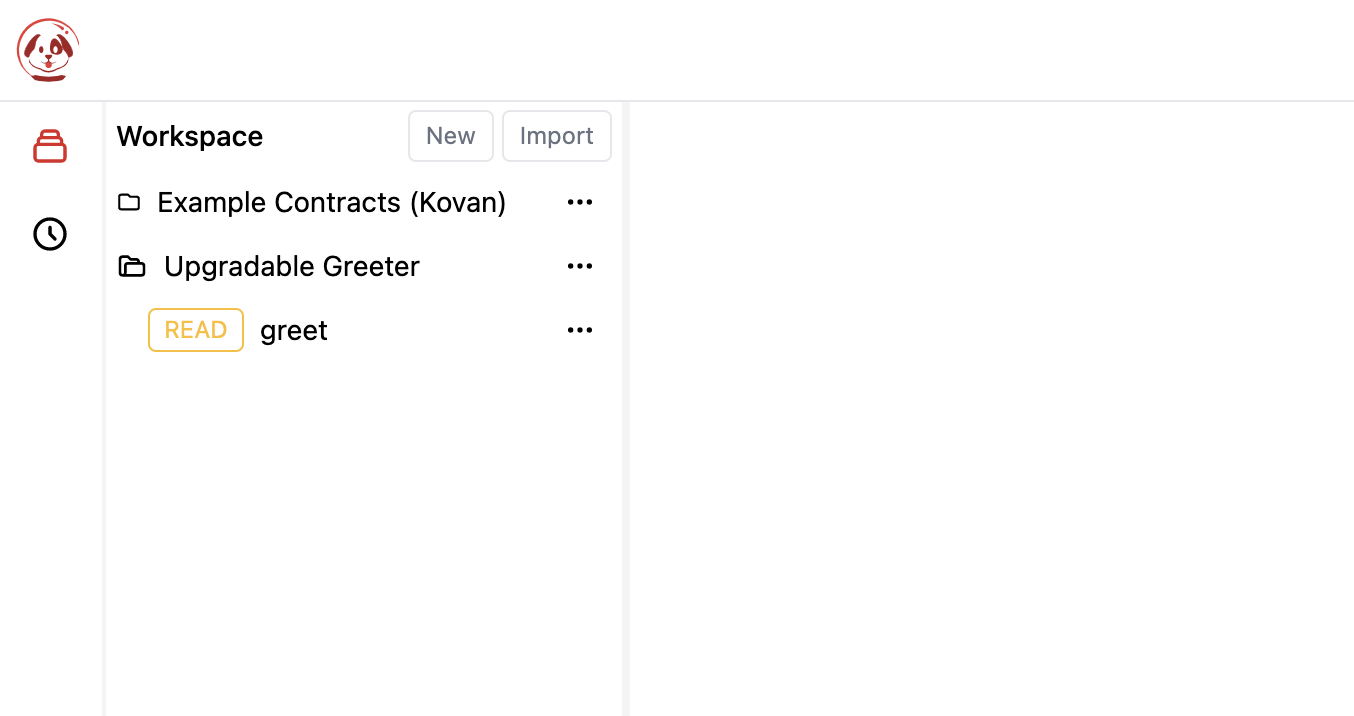
Then click the 3 buttons on the right to choose “New Method”. In this case, we will name it “greet.”
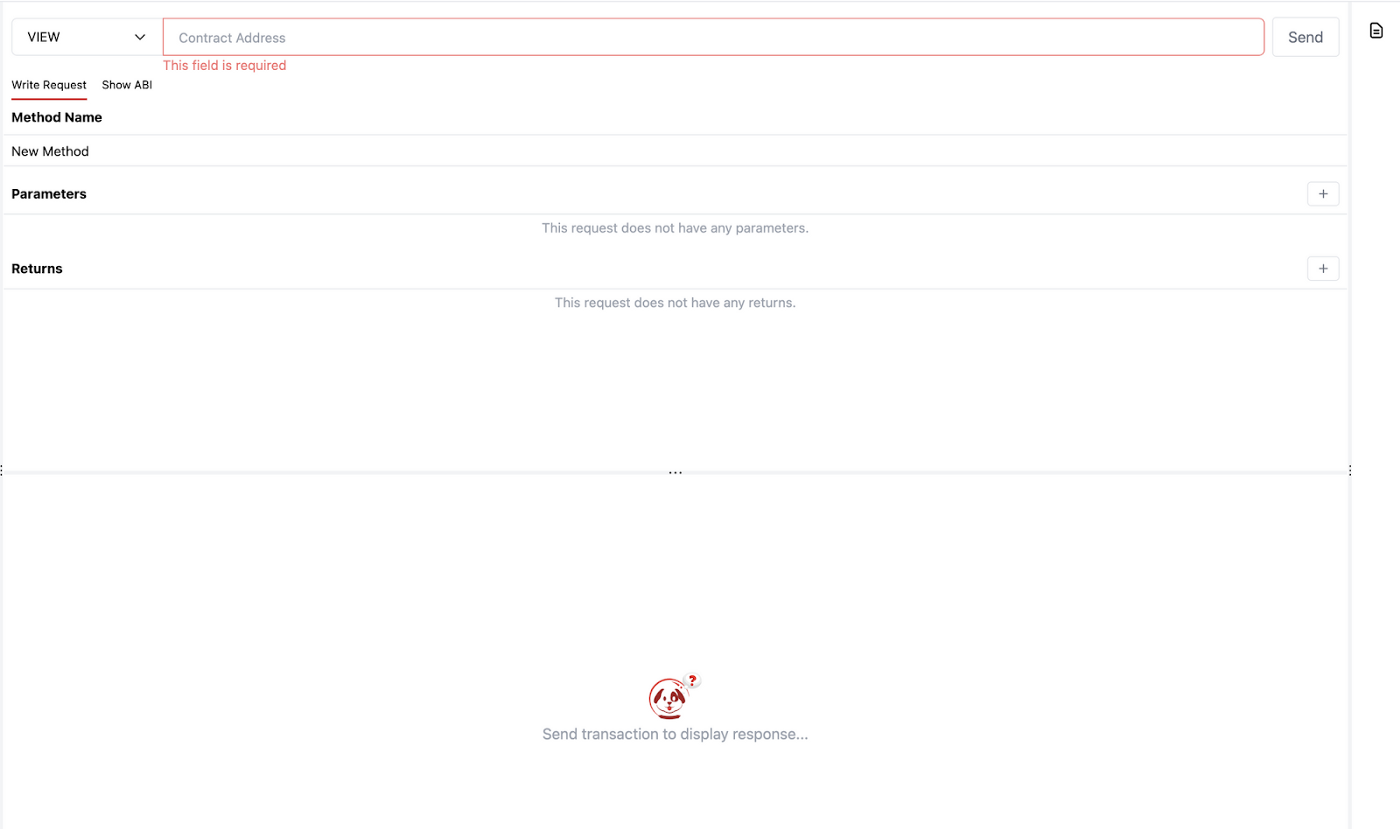
Here’s what it will look like. Next, we paste the contract address from the Hardhat console, change the method to “View”, and choose parameters and returns that you want.
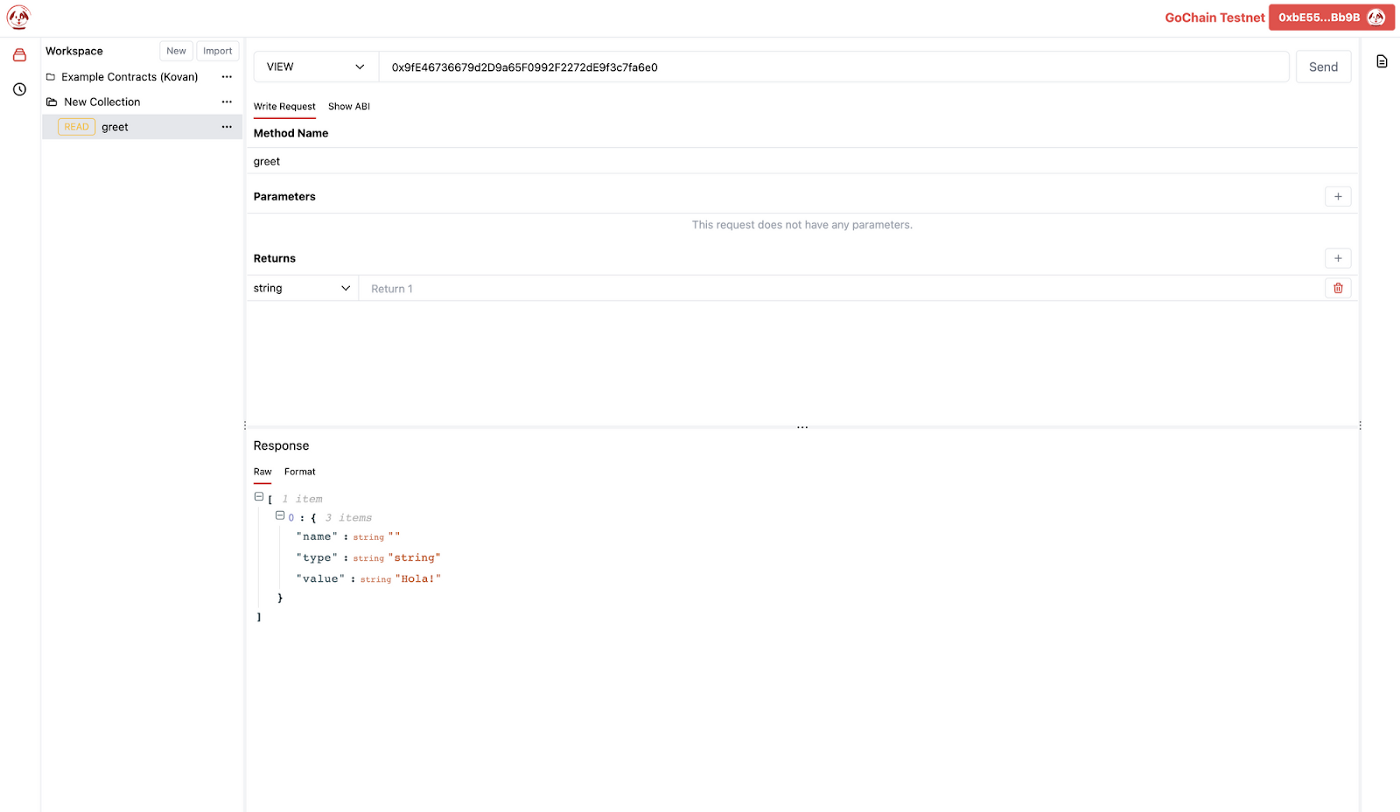
After finishing setting up, we press “Send” and the results will show as the above picture. We can see that the value is “Hola!”, the same as what we set when we deployed.
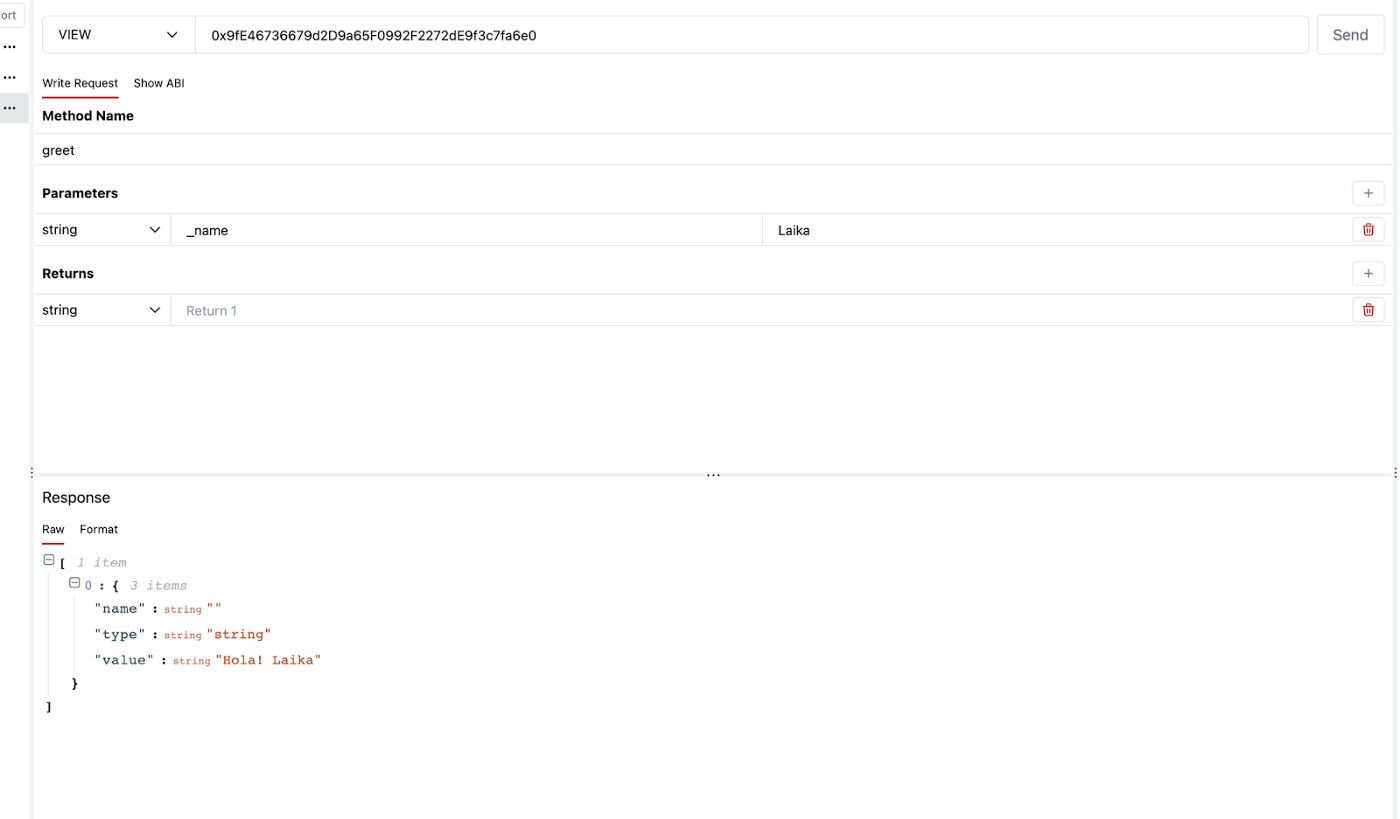
Now, let’s build a contract and try to upgrade it with the new one. (I create GreeterV2.sol for another file, separately)
We open the console and add in the code as follow:

After we upgrade, let’s take a look again at the contract. Because we changed the function parameter, we have to also align with the new contract. Press “Send” to see the result.
All in all, OpenZeppelin can help us upgrade the smart contract, and it is very easy to do so. It is almost the same as when we normally deploy the smart contract. I encourage you to try it out, if there are any questions, feel free to reach out to us!
Are there any cons?
The con about the upgradeable smart contract is the fact that we can mend the implementation of the contract. This means that we can change the logic of how a contract works. The admin can edit the contract and get away with the money in it. Or it can be like the Fulcrum incident that the hacker steals the admin’s key and change all of the implementations and get away with the money. We must weigh the pros and cons before we decide to use it.
That’s a lot for today. The article better ends here. Thank you for reading through this article. Hope you find it useful!
Connect with us
Facebook: https://www.facebook.com/getlaikaapp/
Discord: https://discord.gg/4DzwHuxhcf
Twitter: https://twitter.com/getlaikaapp


