


Part 3: Publish your Smart Contract to Etherscan
You did all the hard work of bringing your smart contract to life - now it's time to share it with the world!
By verifying your smart contract on Etherscan, anyone can view your source code and interact with your smart contract. Let's get started!
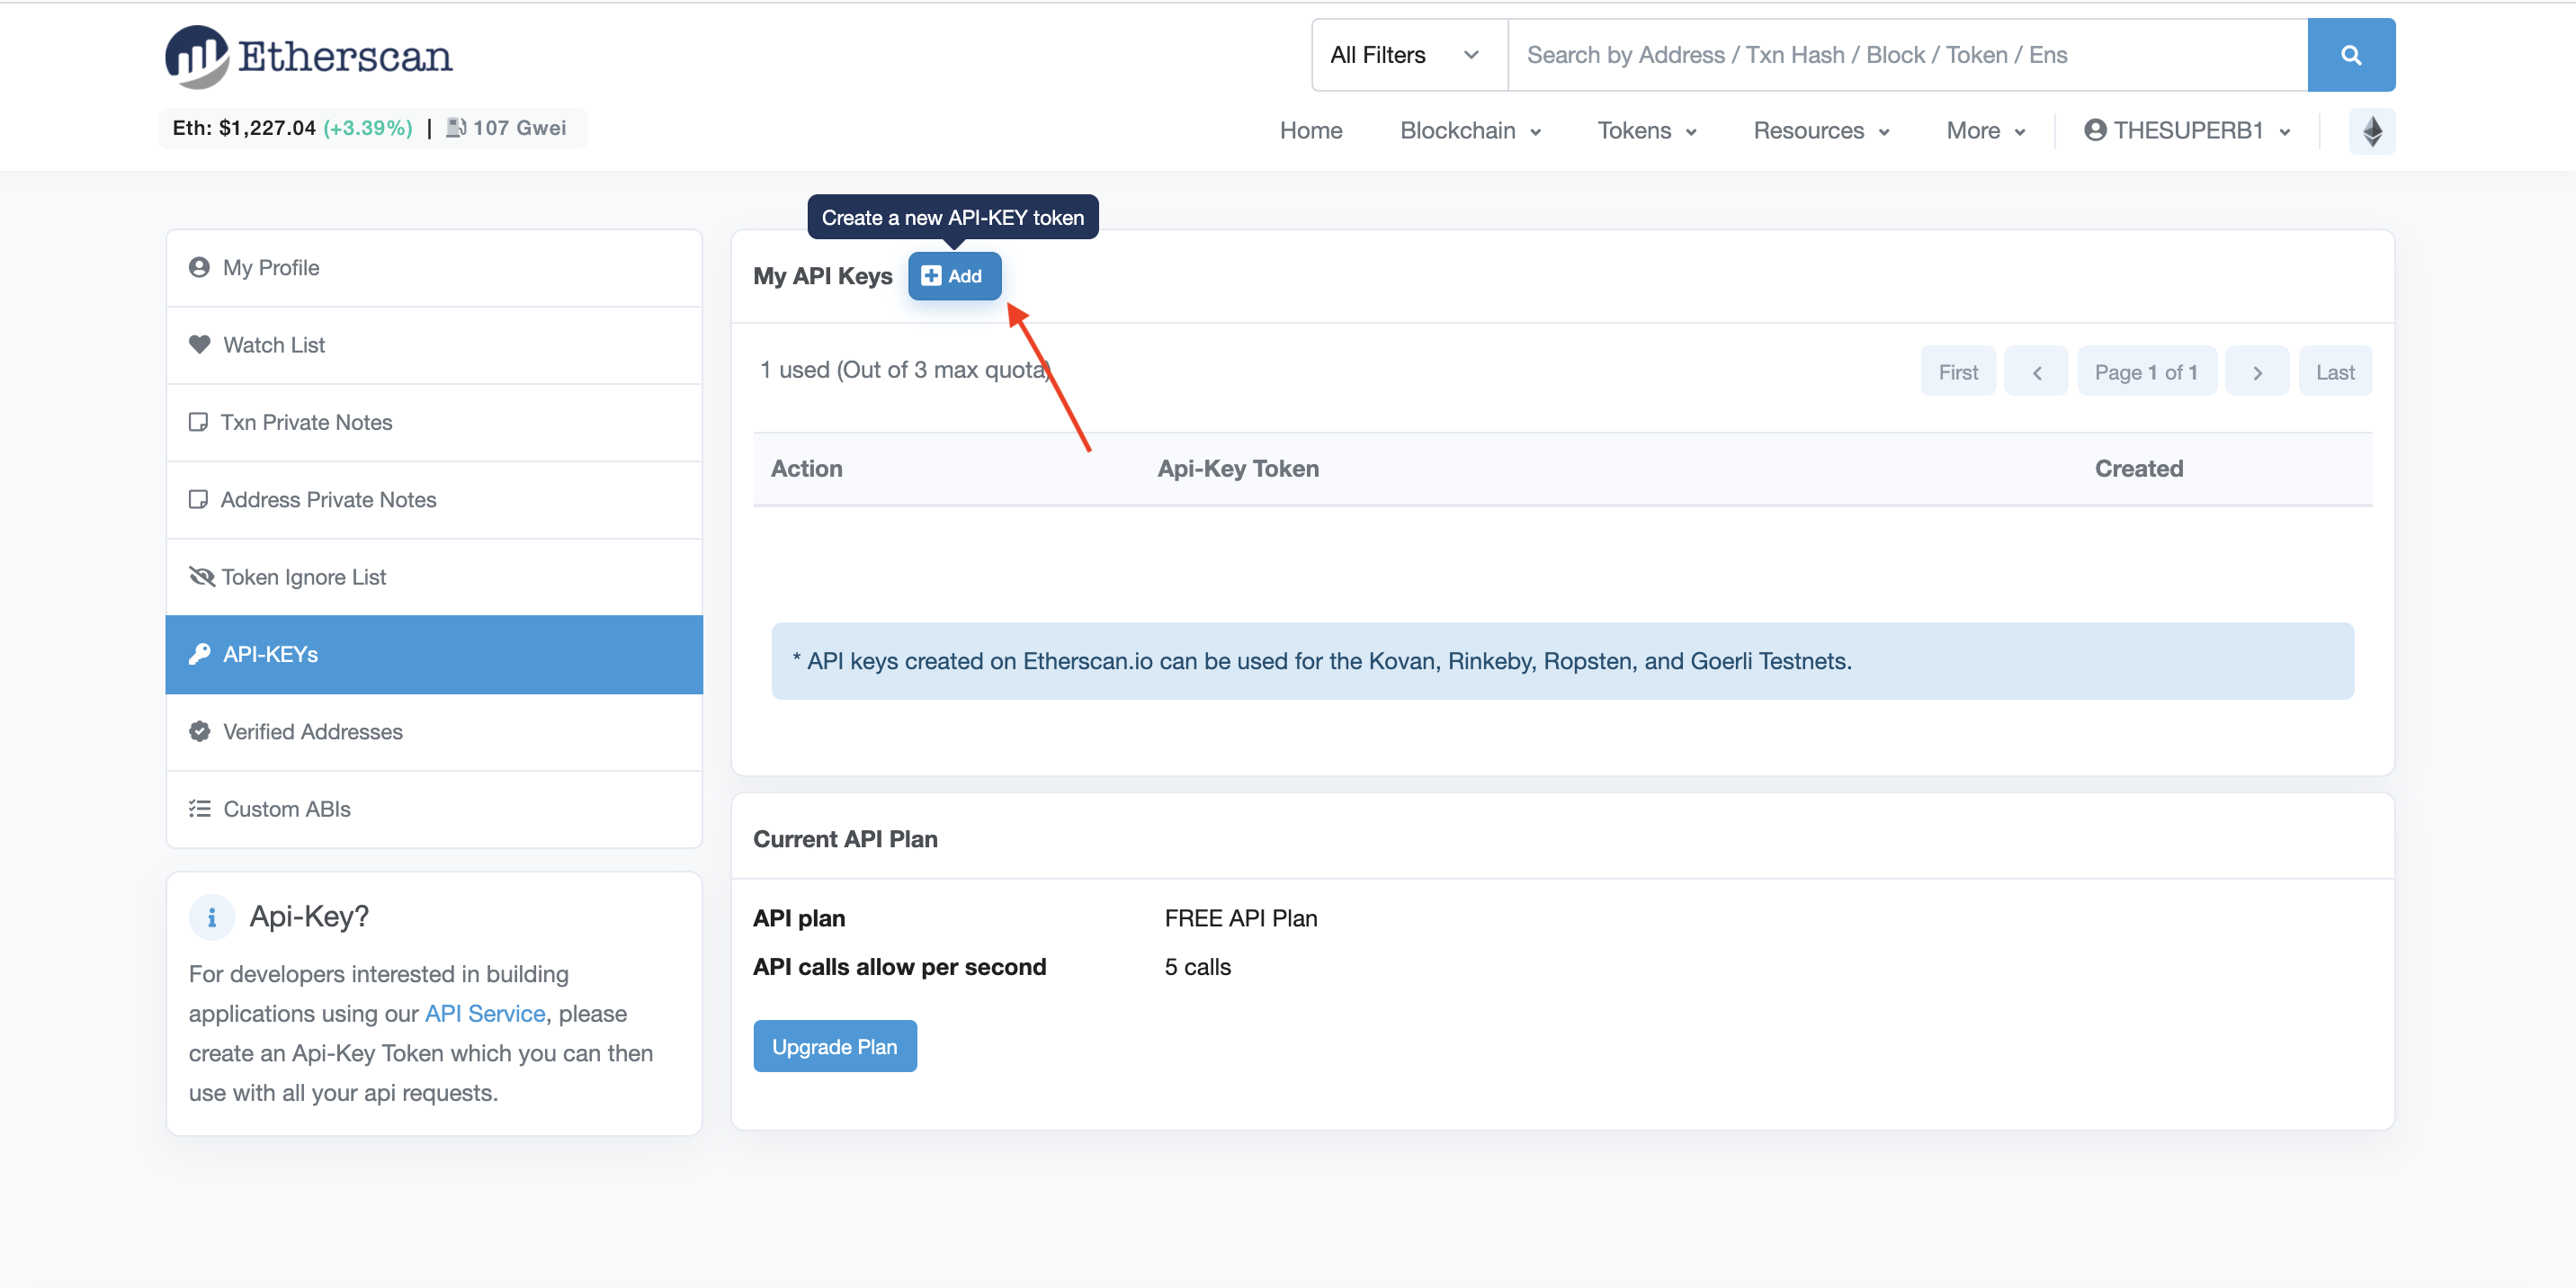
Step 1: Generate an API Key on your Etherscan account
An Etherscan API Key is necessary to verify that you're the owner of the smart contract that you're trying to publish.
If you don't have an Etherscan account, first sign up using this link.
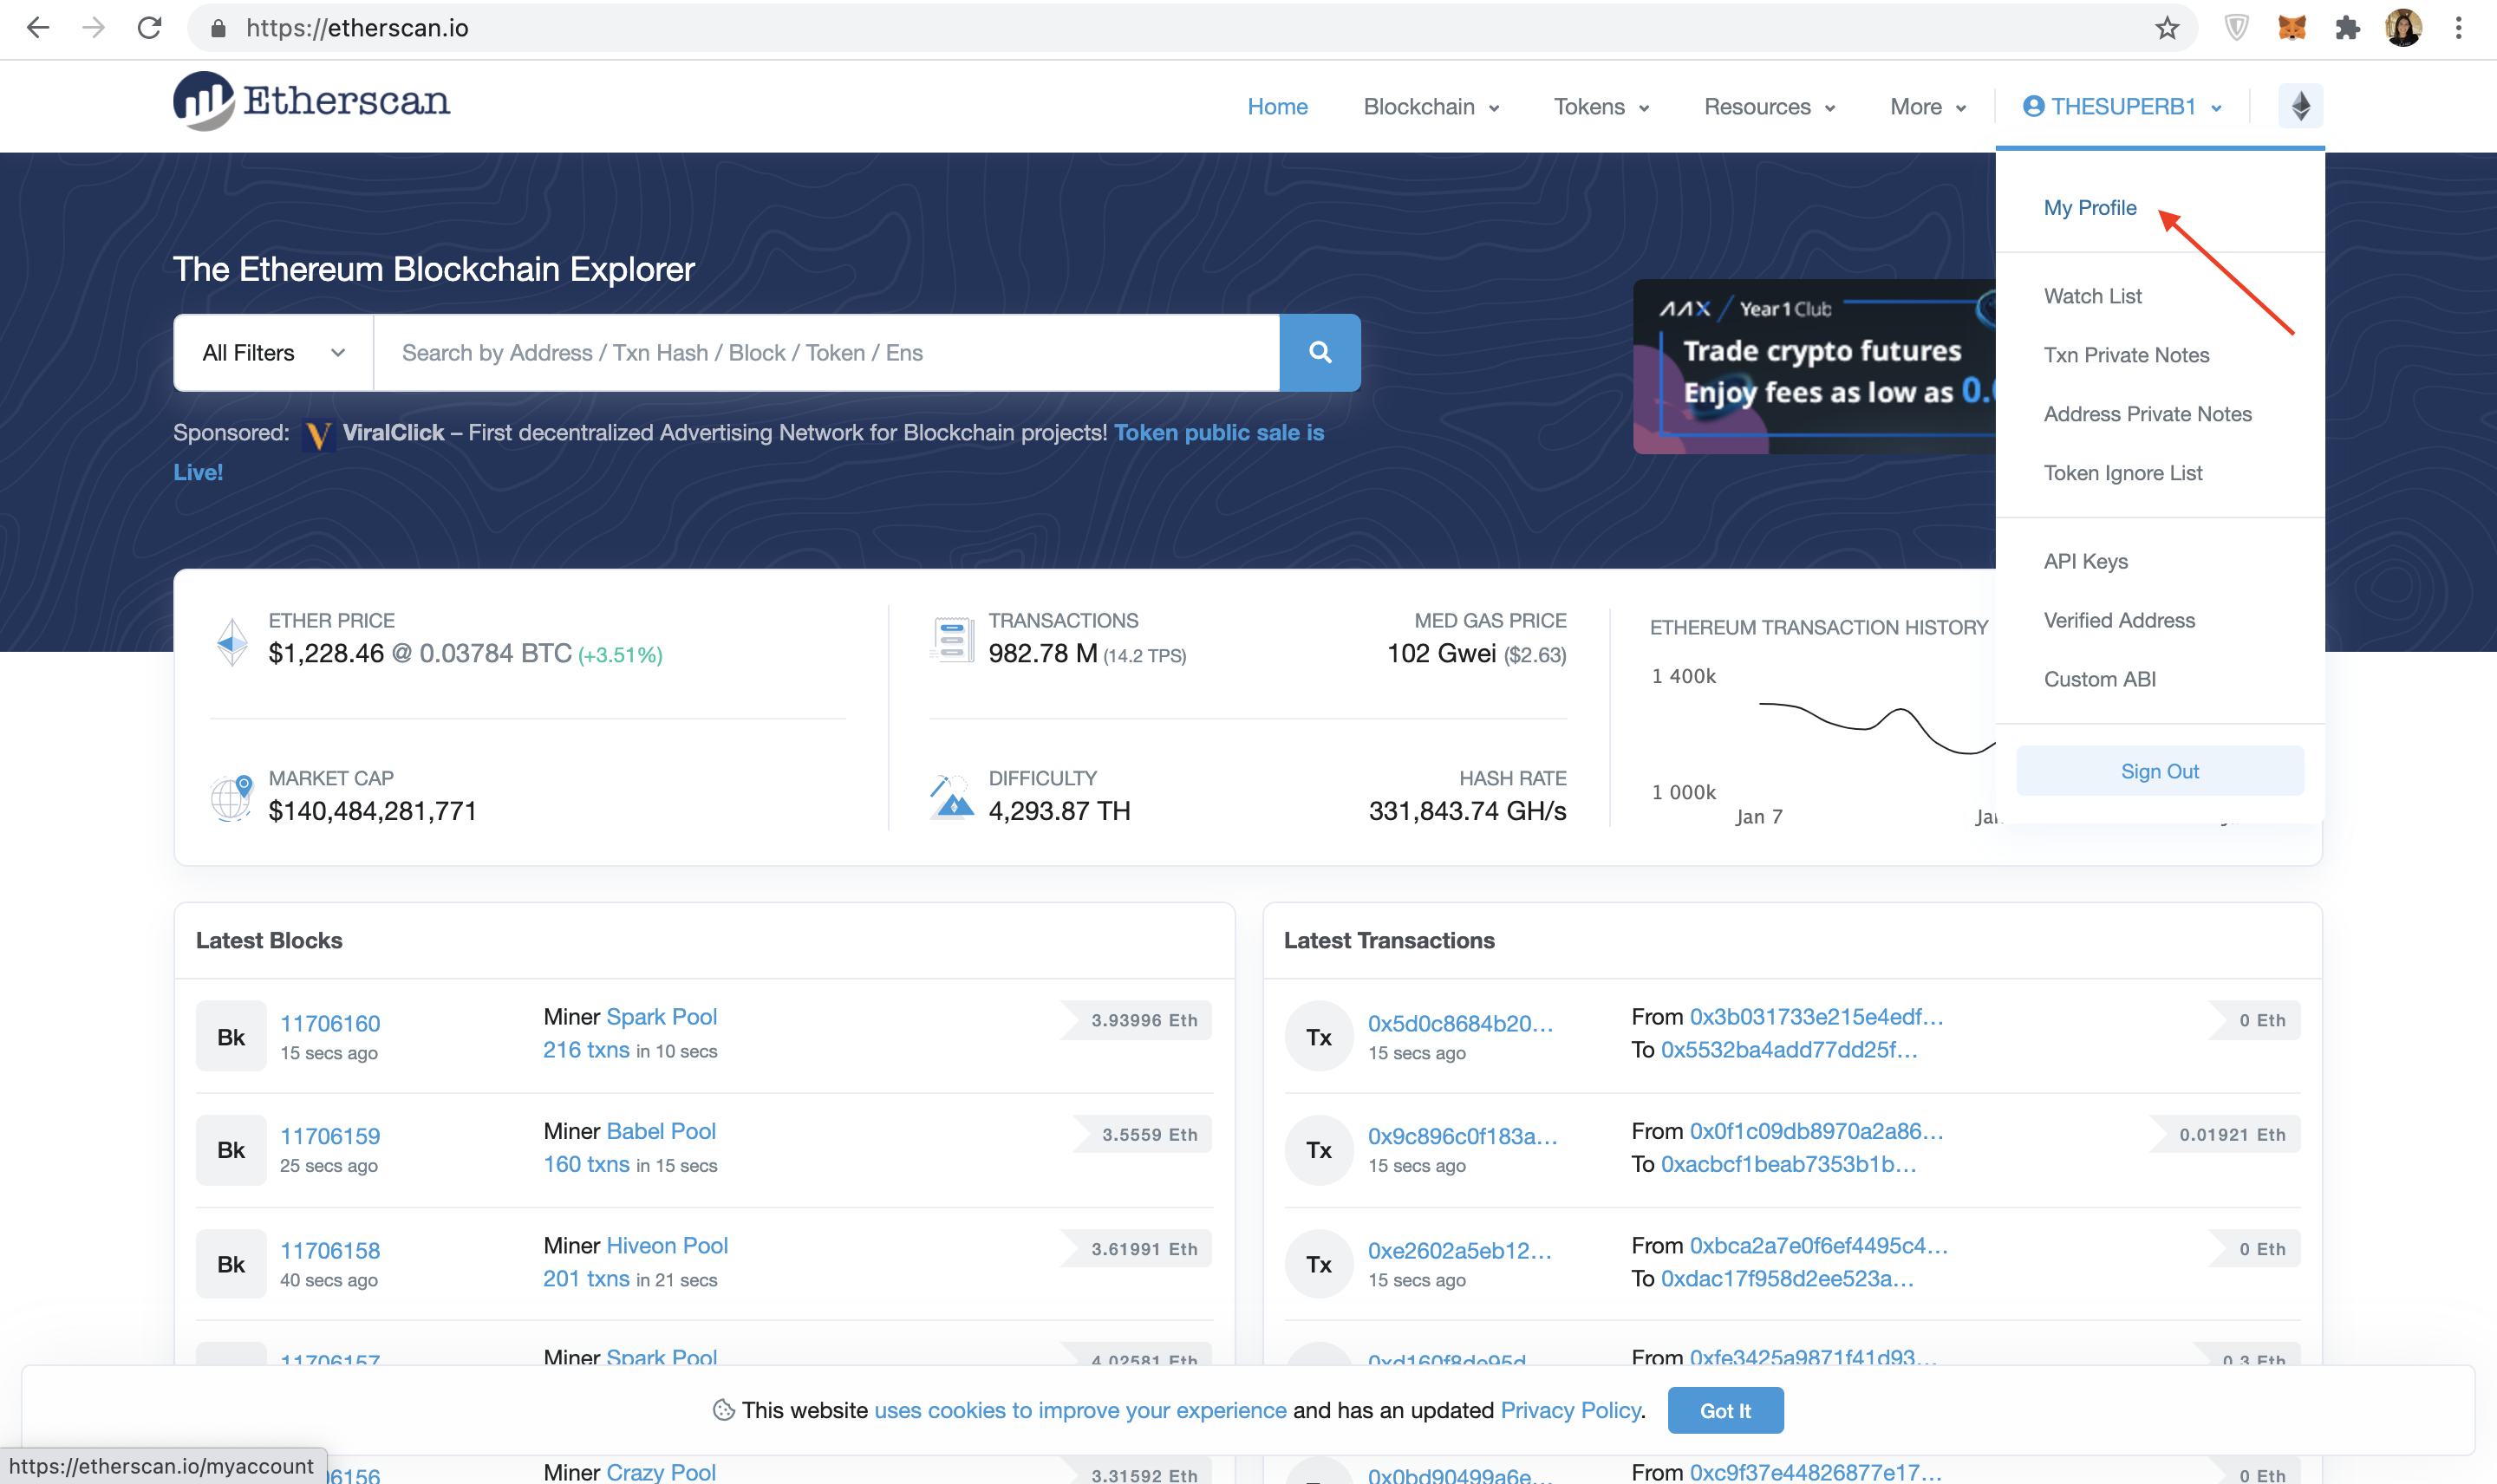
Once logged in, press your username on the top right, and select the "My profile" button:
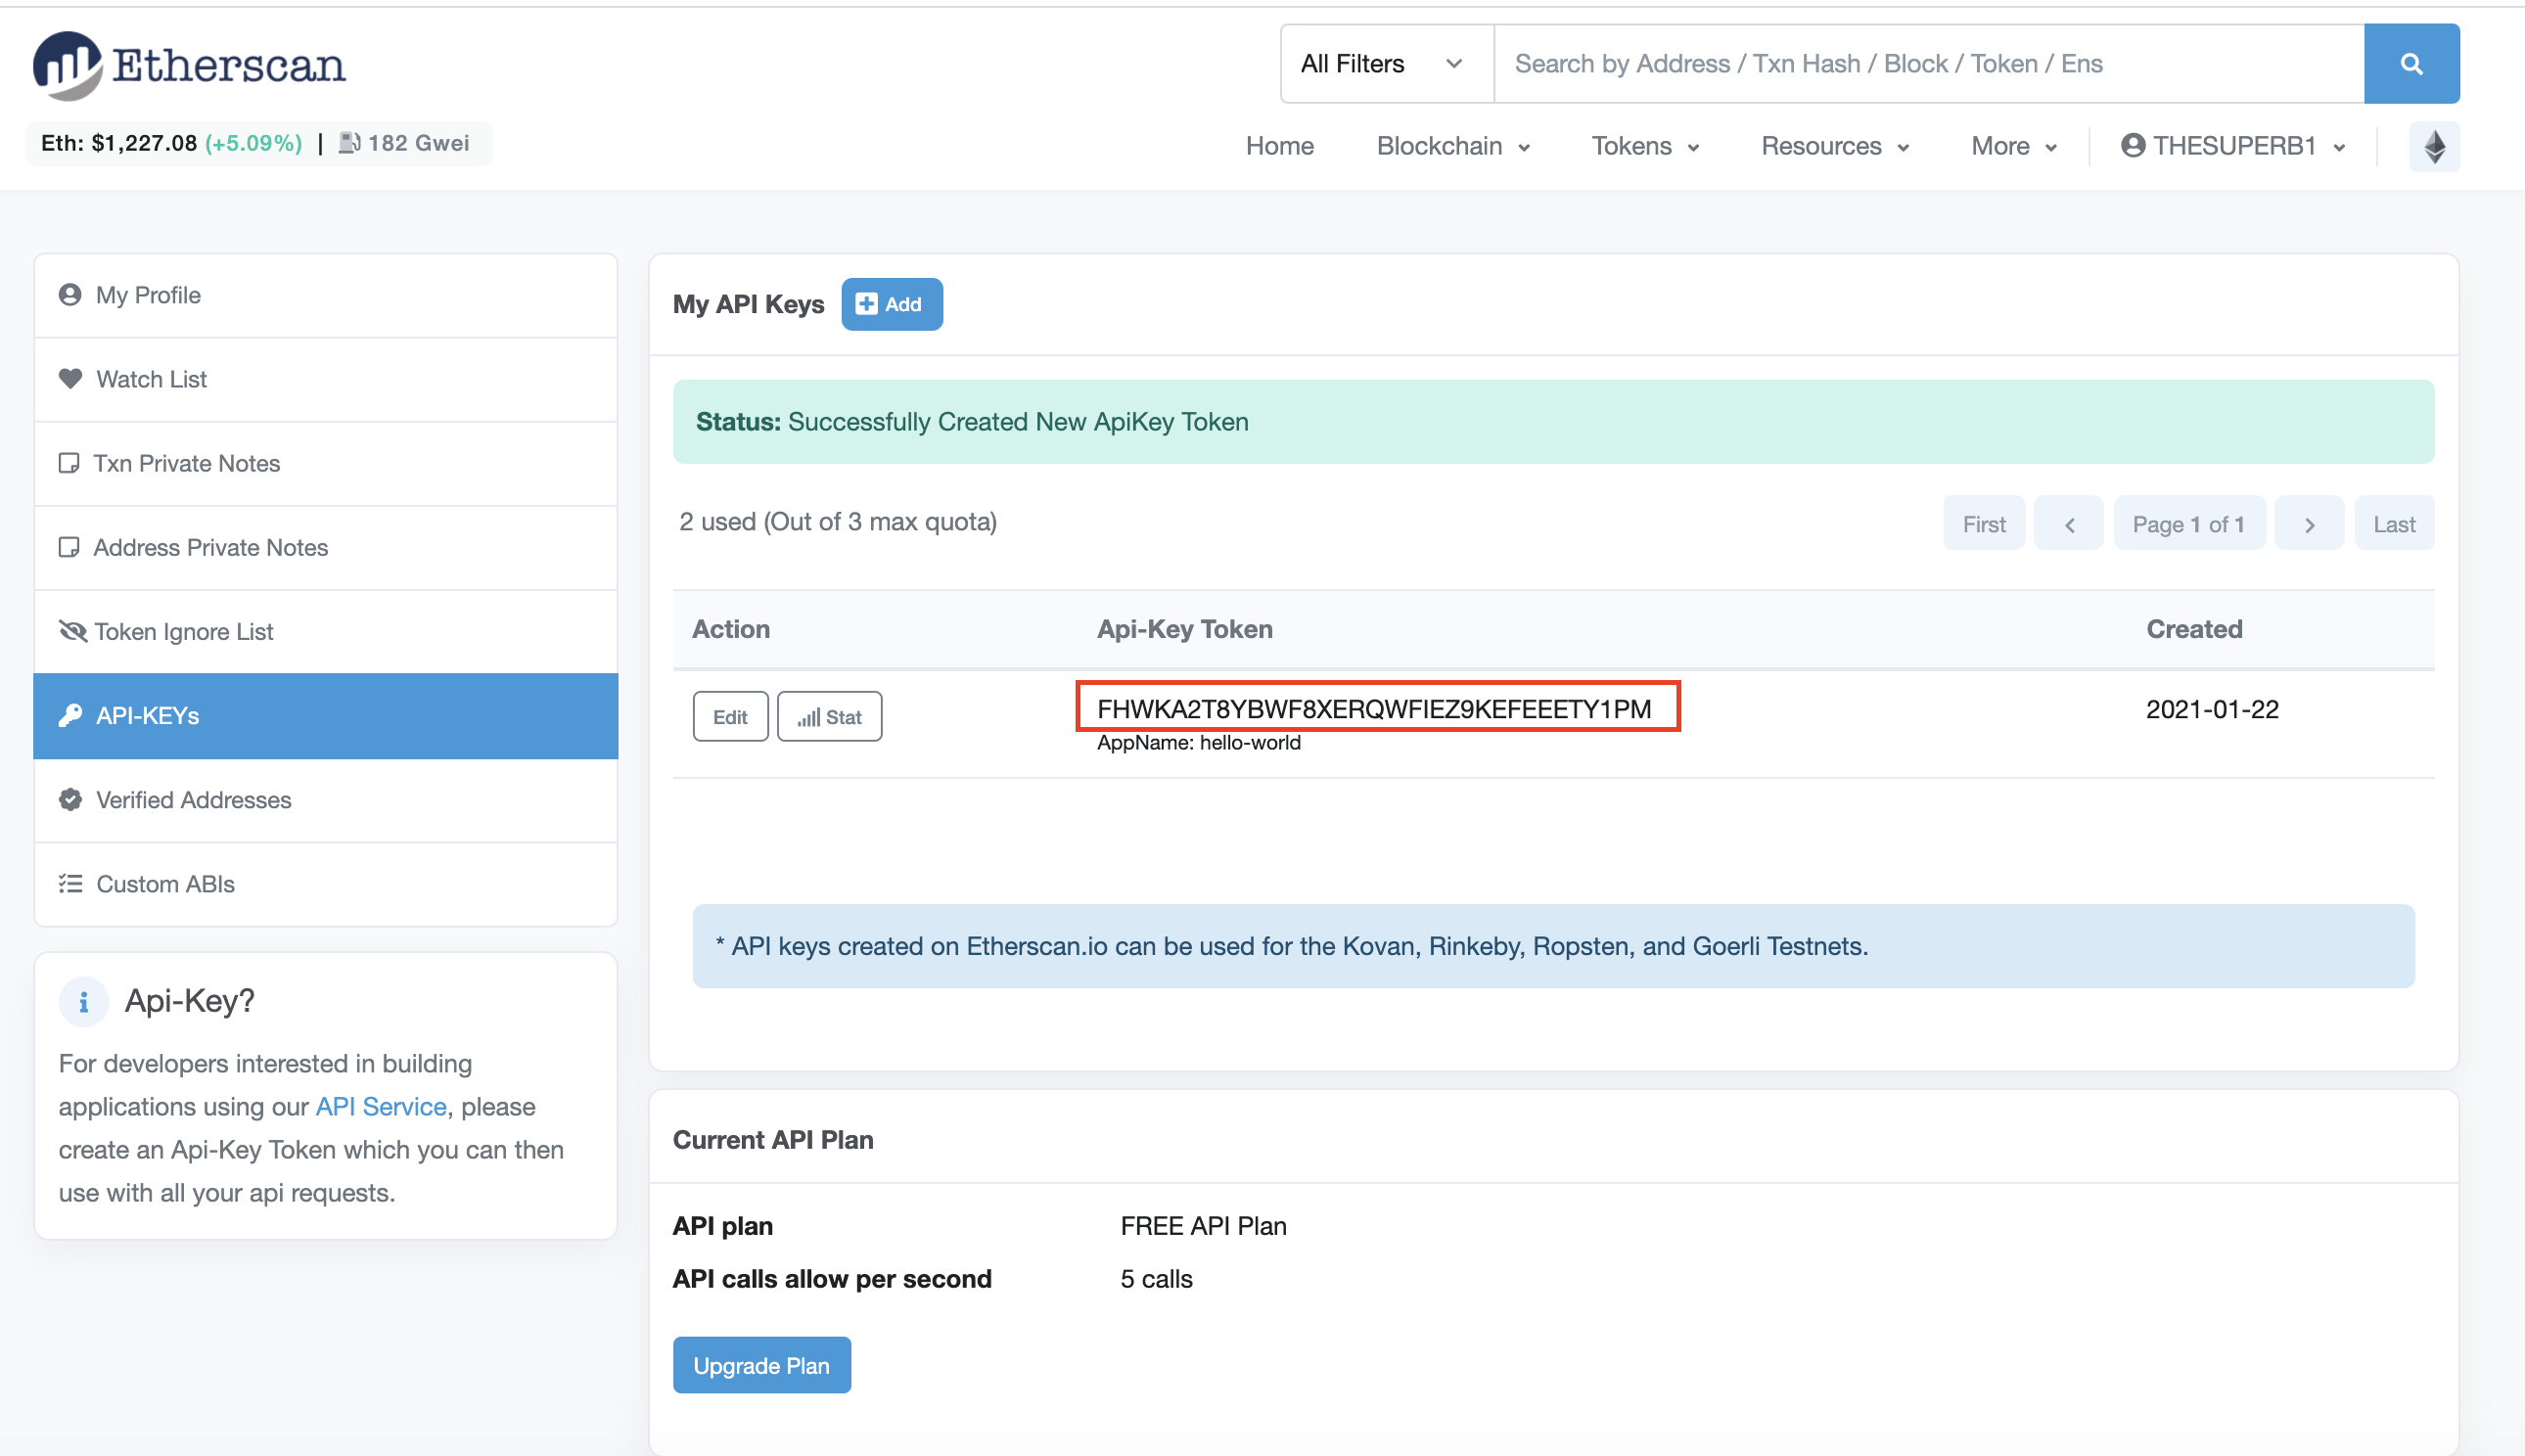
Once you've followed the steps above, you should be able to view your new API key, which we've highlighted in red below. Copy this API key to your clipboard.
Step 2: Hardhat-deployed smart contracts
Step 2.1 Install the hardhat-etherscan plugin
In your hello-world directory run the following command to install hardhat-etherscan:
Modify your hardhat.config.js with the hardhat-etherscan information, make sure to enter your etherscan api key:
Step 2.2 Verify your smart contract on Etherscan!
In the hello-world directory, run the following command in the terminal:
Make sure that DEPLOYED_CONTRACT_ADDRESS is the address of your deployed smart contract on the goerli test network. Also, the last argument, 'Hello World!' must be the same string value that you used during the deploy step in Part 1.
If all goes well, you should see the following message in your terminal:
Congrats! Your smart contract code should be on Etherscan!
Step 4: Check out your smart contract on Etherscan!
When you navigate to the link provided in your terminal, you should be able to see your smart contract code and ABI published on Etherscan!

Wahooo - you did it, champ! Now anyone can call or write to your smart contract! We can't wait to see what you build next! 🎉
Once you complete this tutorial, let us know how your experience was or if you have any feedback by tagging us on Twitter @alchemyplatform!


